| step 4 - buttonholes, ironing, and done
|
| the most convenient way to do this, with a regular old sewing machine, is to use the built-in buttonhole stitch. you can get away with this because they did use this type of rectangular buttonhole on some original straps. uniforms and other things are a different story, they used keyhole-shaped buttonholes. read up in your machine manual about how to do a buttonhole stitch. it's fairly complicated compared to other stitches. once you're comfortable with it, sew two buttonholes on the ends of the strap, a little more than 2cm in length. (the buttons that go through these are 1.9cm in diameter) 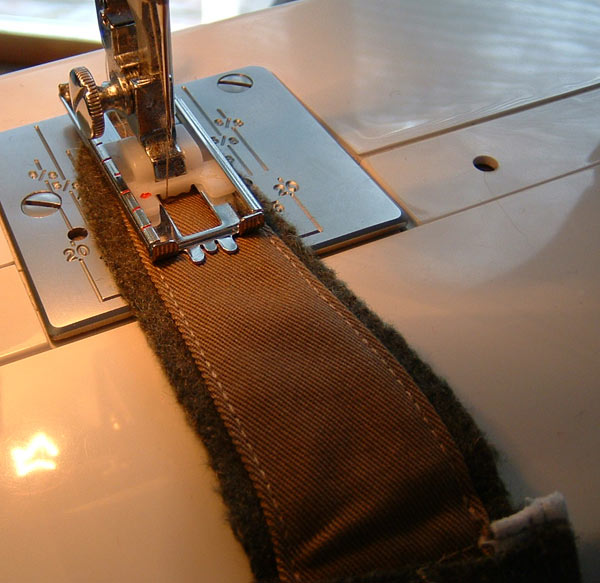
|
| last step is to flatten the whole thing out, cause it's probably a little twisted as a result of the sewing. fire up your iron and get a damp washcloth and put it on top of the strap, on an ironing board or other flat surface. flatten it out with the iron, then flip the strap over (keep the washcloth on top) and flatten it again. and then you're done. |
the finished product: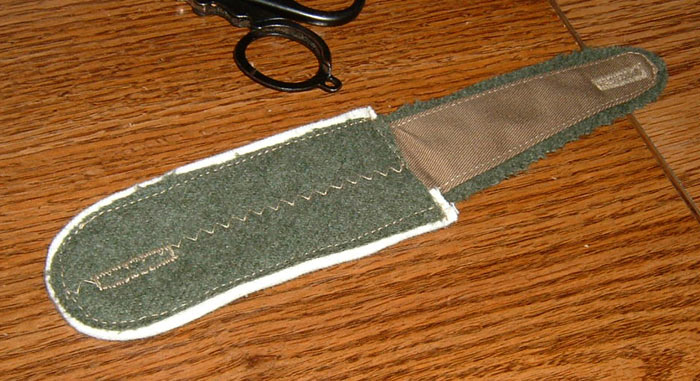 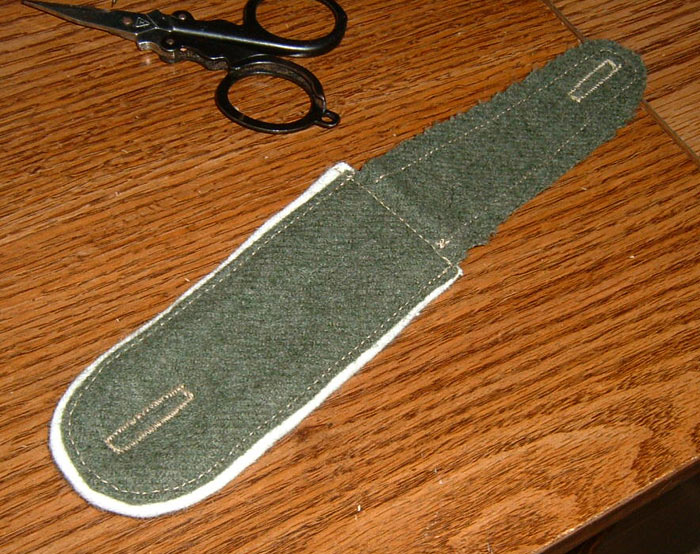 and here it is on a sturm m36 tunic, with the original sturm straps for comparison: 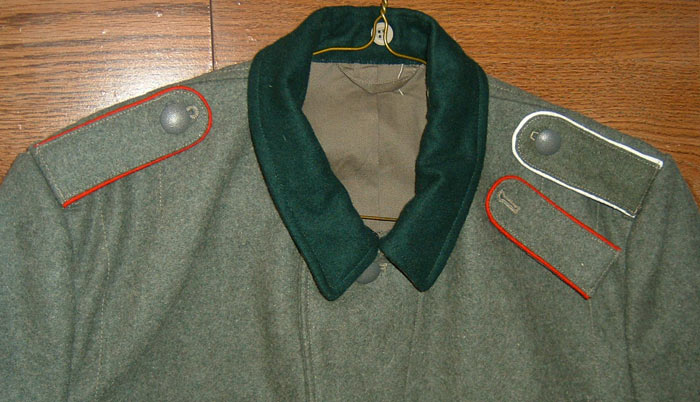 my piping is a liiiittle bit misaligned, as you can see where it's sticking out more on one side than the other. but i pride myself on offering tutorials which explain not only what to do, but what not to do. so i will joyously take pride in this error. |
<< previous