| step 10 - attaching bill to hat
|
| pinning the bill to the outer top. first, get your paper pattern for the bill, and use it to find the center lines of the bill, as shown. then mark it somehow. i usually do it with one pin as you can see in the pic. 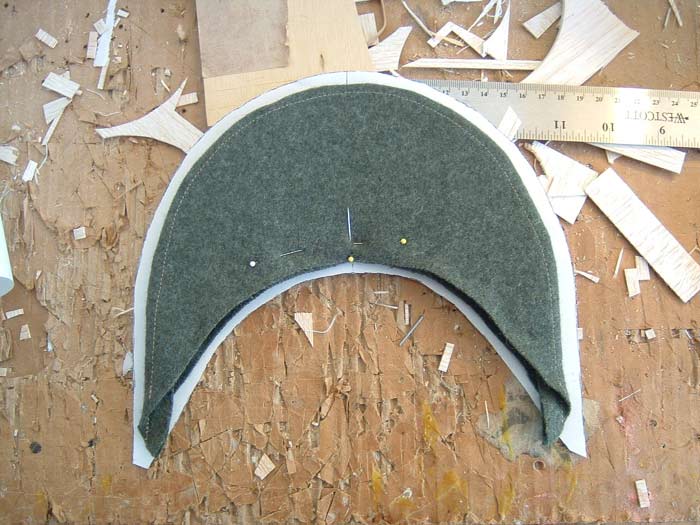 then use that center line marker to align the bill to the center seam on the front of the hat, and pin em together as seen in the middle pic. remember that the topstitch on the bill faces DOWN. also note in the pic how far up the hat to pin the bill. you want the inner edge of wool to stick out a bit, about 1cm. 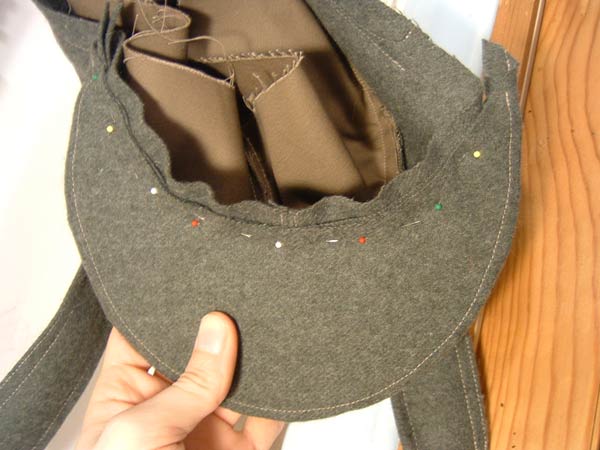 then sew these together (don't sew the liner) here, but put the stitch a little farther out than your pins. you should be able to sew the thing without removing any of the pins, but whether you do or don't remove the pins while sewing is up to you. the point being that you don't want to put this stitch right up against the cardboard edge in the bill, you want to leave a little room for our final stitch later on. also, do NOT stitch all the way to the end of the bill's wool. these pointy ends will be folded further under than the rest, and it'll screw that up if you stitch it all the way out there. just get it to about 2cm from that topstitch on the bottom of the outer bill. 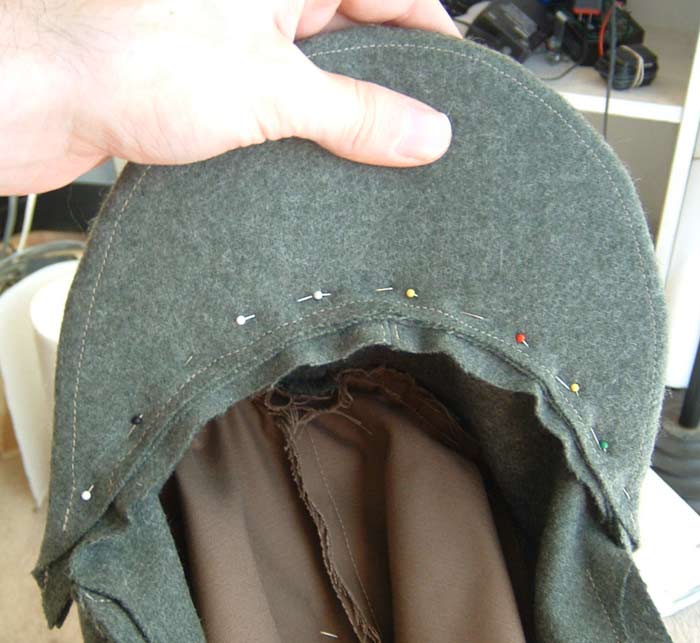 |
<< previous next >>