| step 9 - sewing on insignia
|
| even though i've done it like 6 times this way now, it just occurred to me that it would be a lot wiser if i moved this step to BEFORE the wool sides are sewn to the wool top. the insignia needs to be pretty close to the top of the hat, and after sewing those wool pieces together, there's a big thick wad of fabric that gets in the way of sewing the insignia on, which is itself a rather delicate thing to stitch. however, too late for that here, so on to the sewing. |
| i've seen photos showing several different ways of getting the insignia sewn on, but this seemed like the most reasonable and common way, when using the type of insignia seen on the left in the earlier pic in this tutorial. i forget the name of it, is it "BeVo"? first, switch your threads to a greener type which more closely matches the color of the insignia backing. pin the top of the insignia on facing the wrong way to the outer wool and not through the cotton liner. pin it on as close as you can comfortably get to the top of the hat (probably a little under 1cm from the topstitch) as seen in the top photo attached. sew the top in place there. remember, not through the cotton liner, just the wool.  then fold it down and trim the sides of it to about 1cm in width as shown, and fold them under. fold them pretty close, don't leave a lot of edge showing. stitch them down like that. the way i did it here, to make it easier on me, was to do two stitches, one starting at the bottom and going up the left side, and then another starting at the top right and going down to the bottom and overlapping the first stitch a bit. 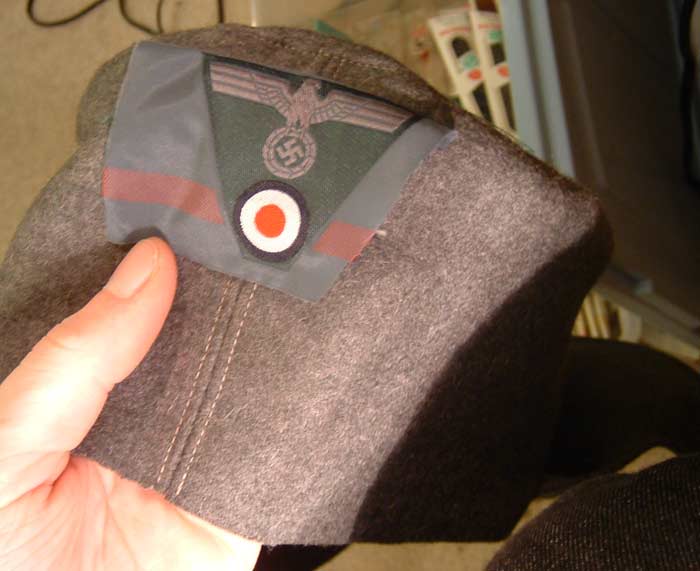 final result: 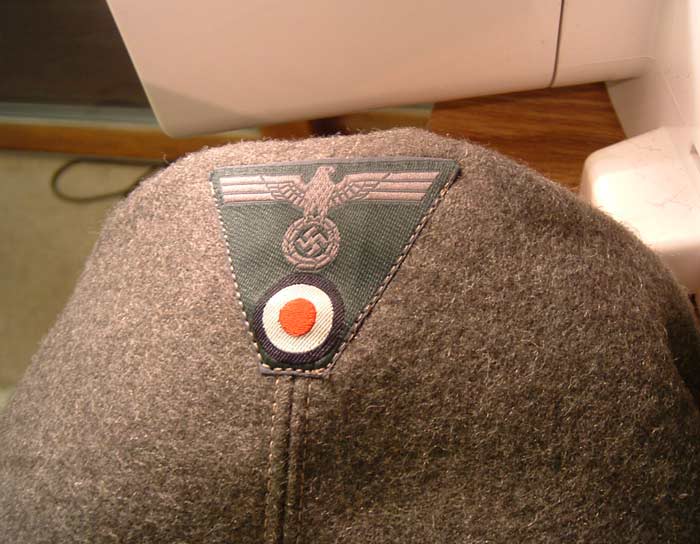 |
| variation: there are a few different types of insignia, you've noticed, like the 2 shown at the beginning of this howto, and also the T-shaped ones of the same design as the one i'm using here. there are also a lot of different ways to sew them on, apparently, such as sewing a zigzag stitch which straddles the edge of the insignia backing, and hand-stitching them on in various styles. |
<< previous next >>