| step 12 - finishing the flaps
|
| well, now you're all done with the hard stuff. it's downhill from here. first you wanna fold the flaps down in the normal configuration and tighten them up in the front and pin them in place to get a good idea of how long they need to be. see top pic. they should be fairly tight around the hat. now, you'll want to take the outer one and fold the end back so that the new end of it will be between 1 and 2 cm past the center line on the front of the hat. pin that fold down to hold it. 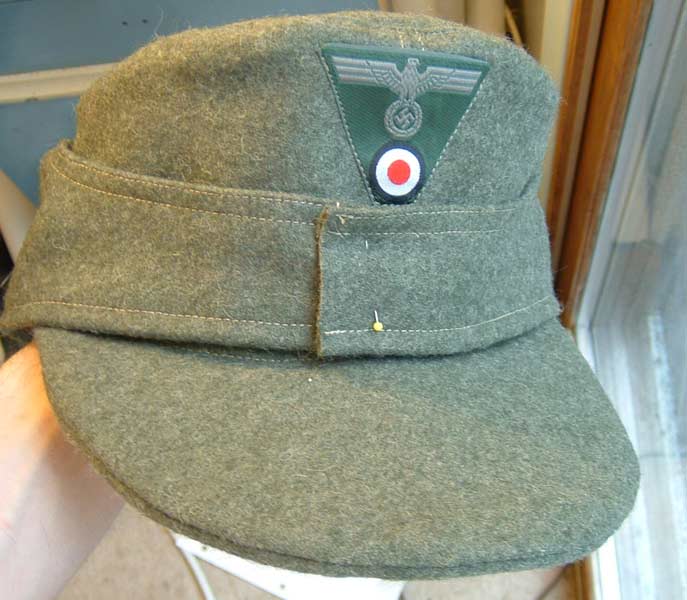 |
and now go get some more feldgrau fabric. pin about a 5cm length of it to the back of the flap, and trim the edges off. see the middle pic for these steps. then sew that backing onto the flap by just sewing right over the stitches that are already on the flap itself. 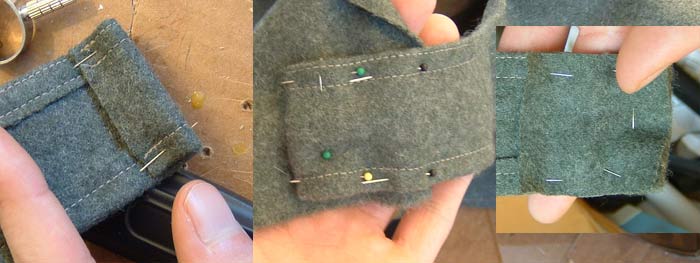 and then, sew another stitch along the tip edge of the flap, from the top of the flap down to the bottom horizontal stitch. see the pic for the final result of all this. 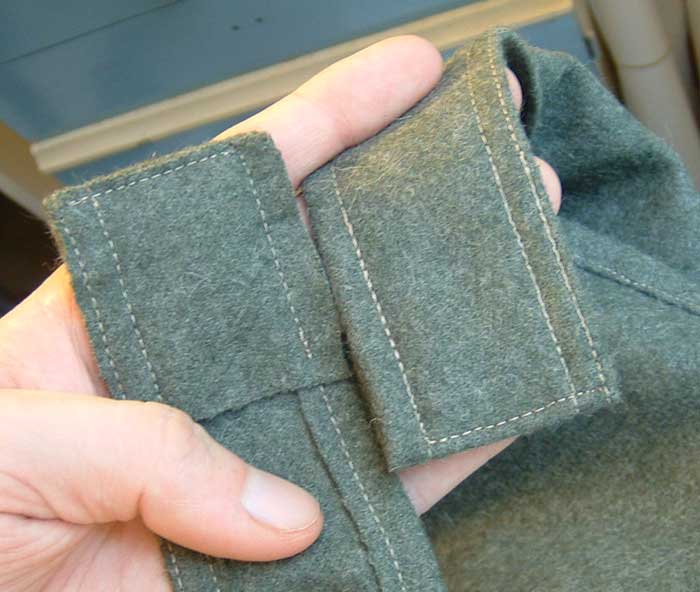 |
| next, the buttonholes. this is another potential flaw in my design, because my machine buttonhole stitching doesn't really duplicate the buttonhole style i've seen on proper repro items. if you google up "buttonhole stitch" you'll find methods for hand stitching a buttonhole which looks more proper. i need to work this into my design some time. but anyway, to do this with a machine, you'll need to read up in the machine manual on buttonhole stitching, cause they'll explain it a lot better than i can here. do a lot of practice with it. practice with scrap wool of the same thickness, and sew it and cut the slit and slip the button through and make sure it all holds solidly. then do it on the hat. do it on the LEFT flap. you want two buttonholes of 2cm length, in the positions shown.  |
next you wanna put the flaps back in the normal position and to figure out exactly where to place the buttons, based on the buttonholes. see the middle pic, where the pins are stuck through to set the placement of the buttons in the flap underneath. 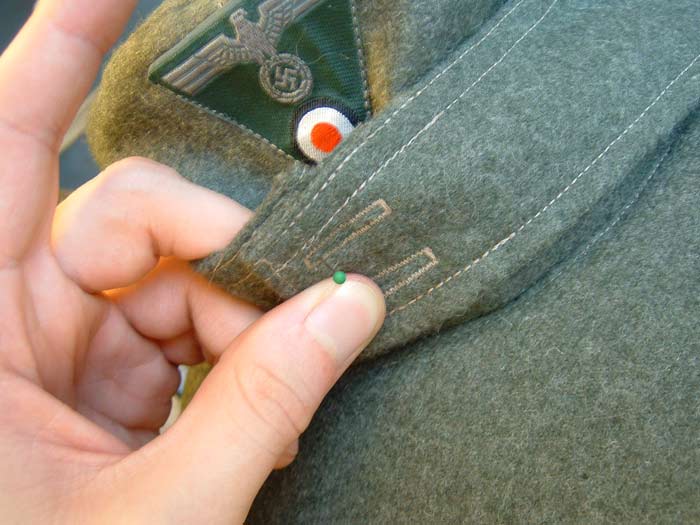 then you're gonna sew the buttons on by hand. can't do it with a machine, sadly. assuming you've never hand sewn a button before, i'll explain. you get your sewing needle and some thread, and you thread it through until you've got like 3 feet of it hanging off the needle. snip it off the spool and tie a knot in the end of it. then tie another knot right on top of the first knot to make a big knot. this is kinda tricky. then, stab it through the hat flap right where your marker pin is. cut the excess thread off the end, and thread the needle through the loop on the button, and back through the flap, and then repeat this like 8 more times. then, thread the needle through the little cluster of thread on the back of the flap over and over again, like 5 times, to make the thread tight, and then cut the end. (see the inset photo at bottom) 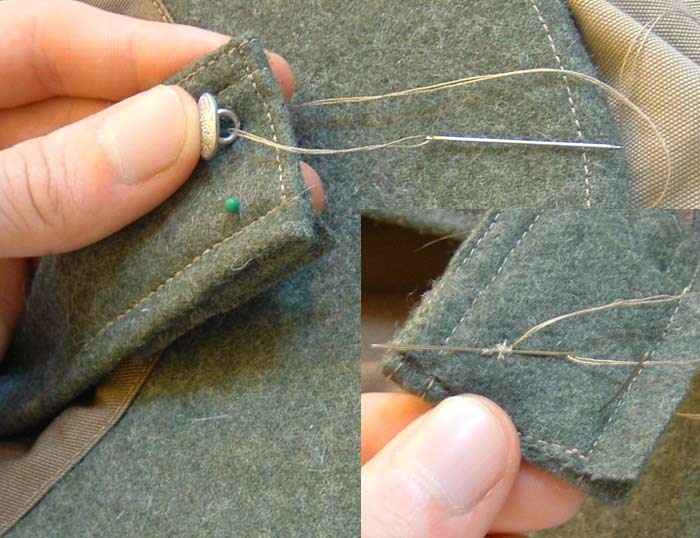  if you're using the pebbled metal buttons, you'll probably have a shiny silvery one. you'll notice that this isn't the right color. i bet some straightforward testor's model paint would suit this well. i'll have to look into what color to get and stuff at some point. |
| variation: there were different types of buttons used, and i think the two most common types were the 4-hole "glass" ones and the metal pebbled ones both shown at the beginning on the howto. also there were hats made with a single larger button on the flap, but i think those were not used much by the heer, mostly luftwaffe and SS. however i don't really know much about those, so i won't go into it here. |
<< previous next >>