| step 6 - sewing sides to top
|
| pin the wool sides to the wool top. make sure you have everything aligned right, meaning specifically: the wide end (the end with you already stitched) of the sides toward the front of the top (the front of the top is the wider end); the peak pointy angle of the sides attached to the top, rather than the flat (or flatter, anyway) long edge of the sides. hopefully the photo makes this clear. you may want to pin and un-pin the paper pattern to the top at various points while you do this, to use its markings to find the center line of the top, so that the sides won't be shifted wrong to the left or right when you're done. the edges of the fabrics should be right together all the way around, except for the peak pointy part of the sides, which will stick out a bit over the end of the top piece. note: my cat not doing a damn thing to assist me here. 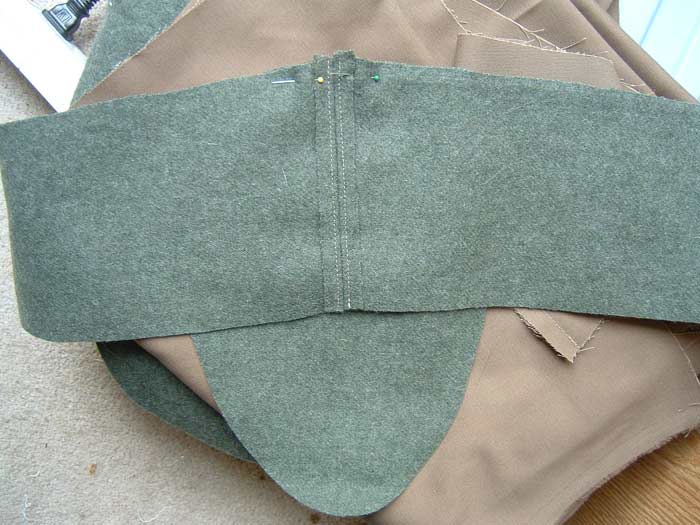 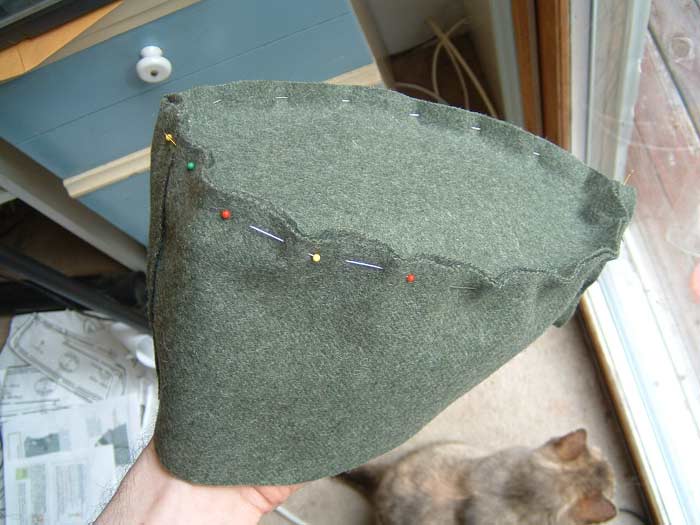
|
| now that you pinned that thing all around, you're NOT going to sew it. first, you have to sew the rear of the side pieces together. so, since you have it pinned around, you go to the rear of the thing and you align the two rear edges of the side pieces and pin them together like so. be sure that, when they're pinned together like that, they seem to fit the rear of the top piece. that is, that they dont extend out beyond it and stuff, and that the edges of the sides and top seem to line up close, the same as they do around the rest of the edges. now, here comes a potential flaw in my design. i never did really get a good handle on how to adjust the size of this hat while making it, i just sort of eyeballed it and could make ones a little bit bigger than my head and a little bit smaller, but i was never too sure if i was coming out with a size 56 of 58 or whatever. i know that my head is about 58 or 59. this pattern, as is, fits me pretty well. i'll try to elaborate on this: if you pin the sides as shown in the sketch, so that the stitch parallels the rear edge of the sides, you'll more or less get a 58cm size hat. the top side of that stitch has to stay where it is, so it fits the top piece of fabric, but if you move the lower end of that stitch, just a centimeter or so in any direction, you'll get some workable size changes. see the crappy sketch. 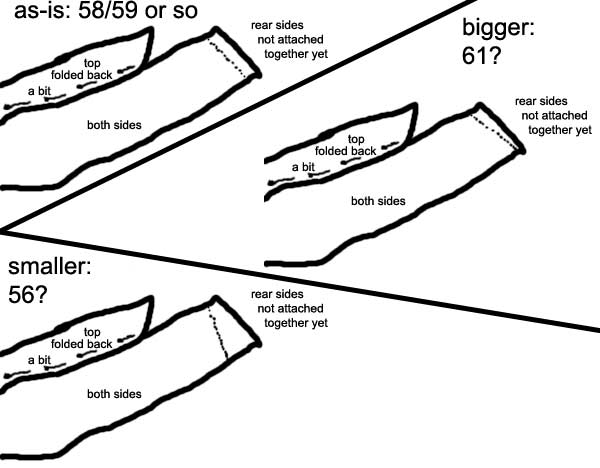 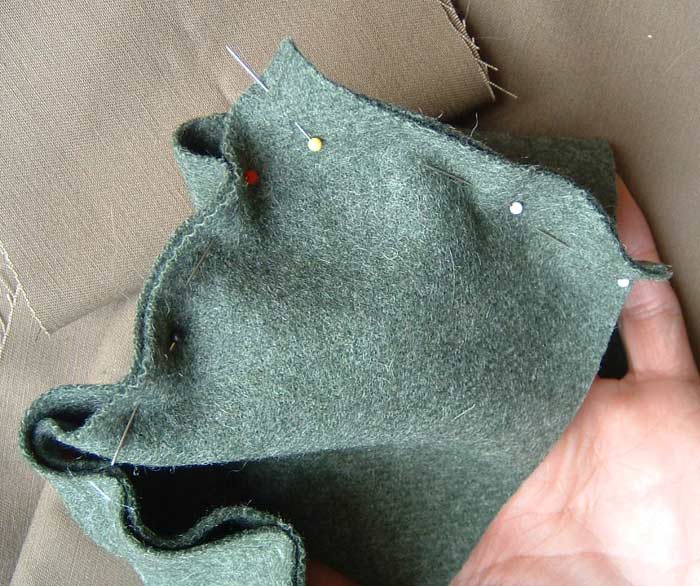
so then, you unpin the top from the sides around the rear area, enough to give you wiggle room to sew the rear, and sew it like you did the front side. one stitch to connect the two pieces of fabric together, and then fold the little leftover flaps apart and sew each of them down, about 1mm away from the first seam. |
then, you pin everything to the top again, and sew all the way around it. go slow, and take care to make sure that one side of the fabric doesn't bunch up and fold under itself while you're going along, especially around the corners. also remember to sew the front end of it flat-ish, to conform to the shape of the top piece of fabric rather than the pointy edge of the side pieces. when done, it should look like so: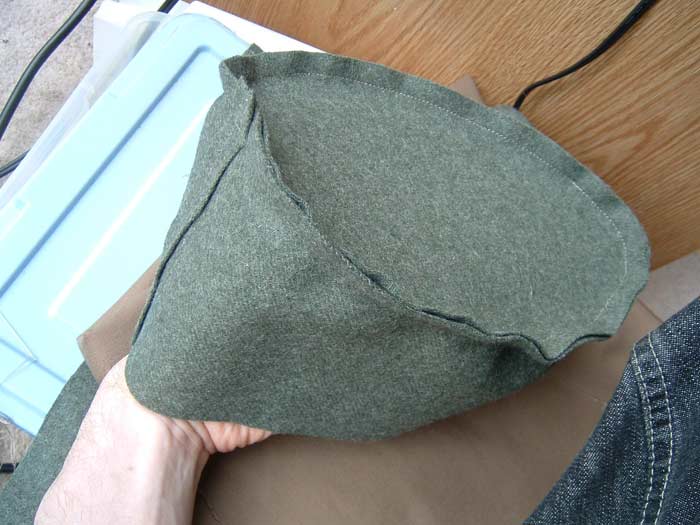
|
<< previous next >>