| step 7 - topstitch around crown
|
| putting the final stitch around the top of the hat. this is a more complicated procedure. first, go get the cotton top-piece that you cut out a while ago and haven't touched since. pin it to the wool top as shown here. 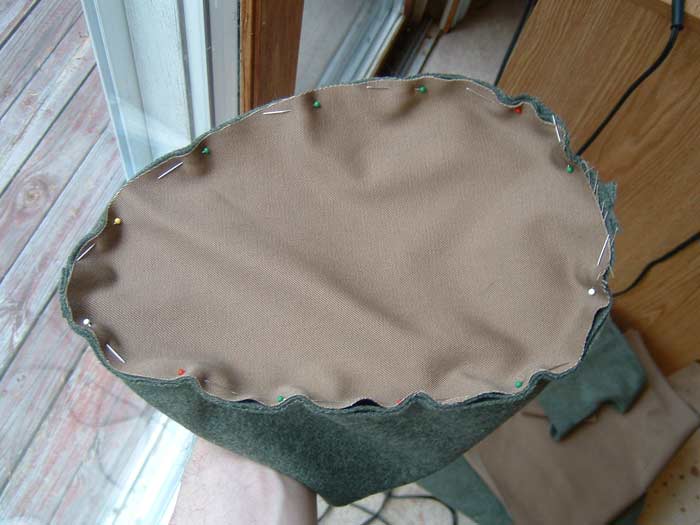 |
then, pin the cotton side pieces onto the top, mirroring the wool top/sides. remove the pins from the cotton/wool tops and put them through the cotton sides+cotton top+wool top. that is, you don't want to have pins covered up by layers of fabric, just one set of pins on top. make sure that the raw edges of the cotton pieces that have been stitched together are facing outward. see last 2 photos. you could probably combine this and the above steps, but i do them separately so that the cotton top and cotton sides are all lined up properly to each other.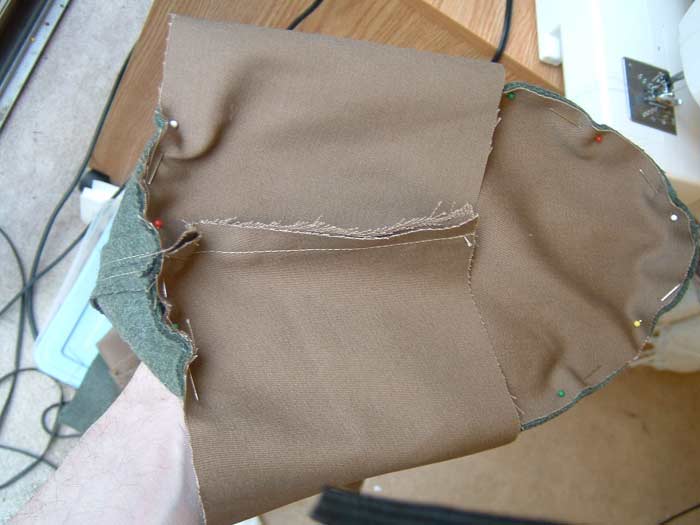 |
with everything pinned around, and the rear of the cotton sides pinned as seen in the last photo above, now turn the wool inside out. this is actually right side out, as you've been sewing it inside out until now. with the hat right side out, check to make sure that the liner sides and the wool sides more or less fit each other, and one isnt larger or smaller than the other. adjust the pinning of the rear of the cotton sides to make sure everything fits. unpin the rear cotton sides a bit to make room, and sew the rear of the cotton sides together. (just one stitch though, don't topstitch. remember that we don't want any stitches visible inside the hat, only seams)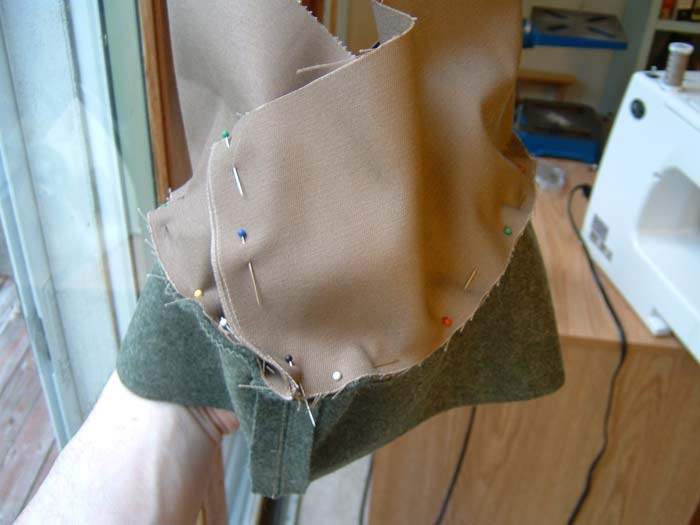 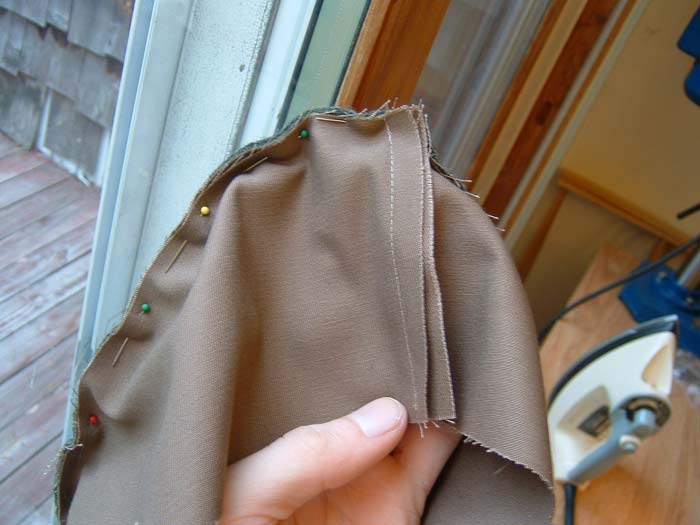 |
| now, what you want to do is kind of a funny thing. with the hat right-side-out, so that your pins are on the inside, you want to add another layer of pins on the outside. describing the spatial relations of this is daunting, so i'll let the photos explain. you want to pin around the top on the outside and remove the inside pins. note in the photos exactly what layers of fabric the pins are going through and what layers they are NOT going through. note that if you looked on the normal inside of the hat, you wouldnt see any pins at all. you only see the pins when you're looking between the cotton liner and the wool shell. you're going to be sewing a stitch that WILL be visible as a topstitch on the outside of the hat, but will NOT be visible inside the hat. took me quite a while to figure out a procedure for doing this. also note the direction of pins, for ease of sewing. they go around the top of the hat, aiming counter-clockwise. 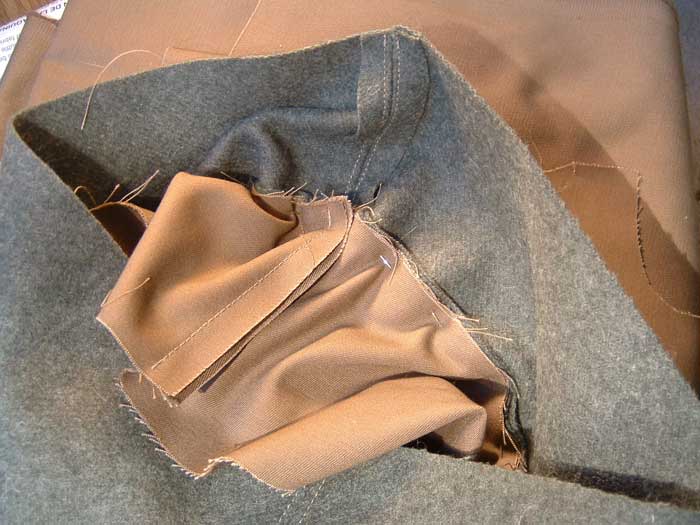 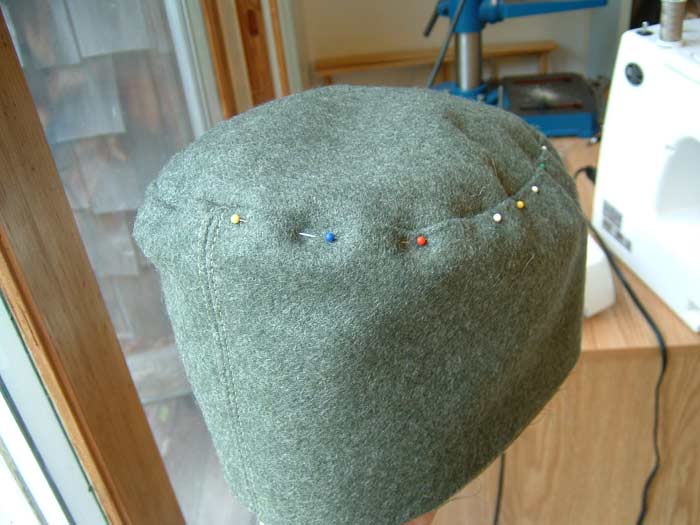 |
now you sew this stitch. see photos for the alignment of fabrics on the sewing machine. note that the cotton liner is aimed off to the left, not to the right. there's only a little 1cm flap of the liners that you're sewing through. be careful of the liner while you're sewing, make sure it doesn't stray around under there and get folded up and stitched wrong. another thing to watch out for is that your sewing needle doesnt stray too close to the outer wool seam, as you'll see in the bottom photo. you want your topstitch about 1mm from the seam, but since you're sewing through several layers of crap, its easy to stray too close and you get an uneven looking seam. you want that topstitch nice and even all the way around.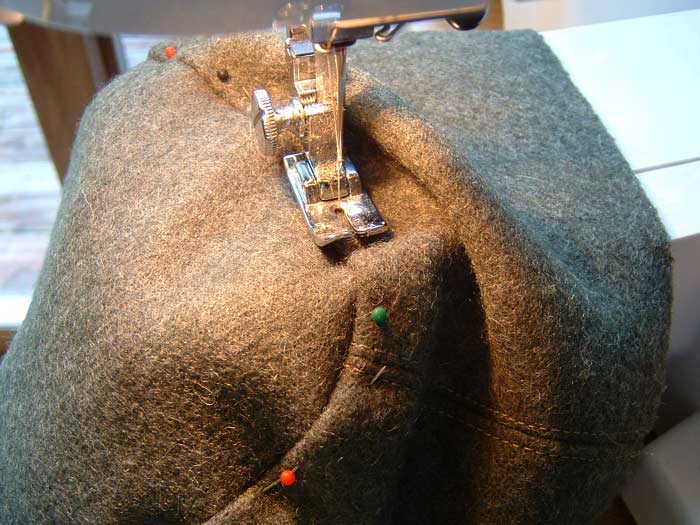 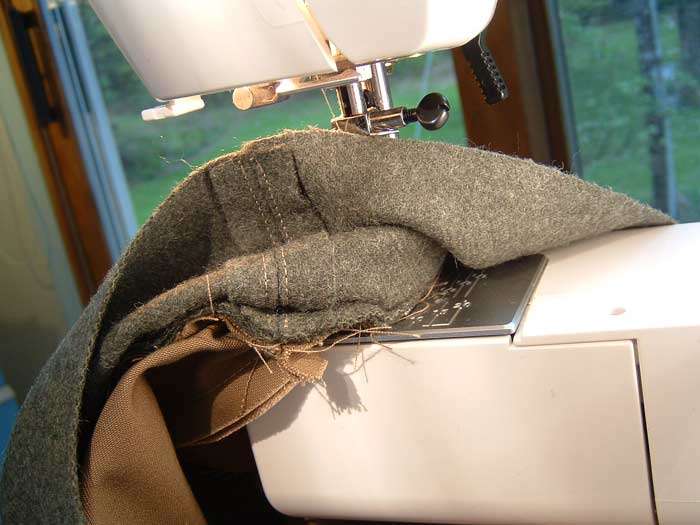 i did a rather bad job on this one here, so consider it an example of what not to do. we'll just pretend that this is a very late-war hat when the germans were desperate and cutting corners and all that. 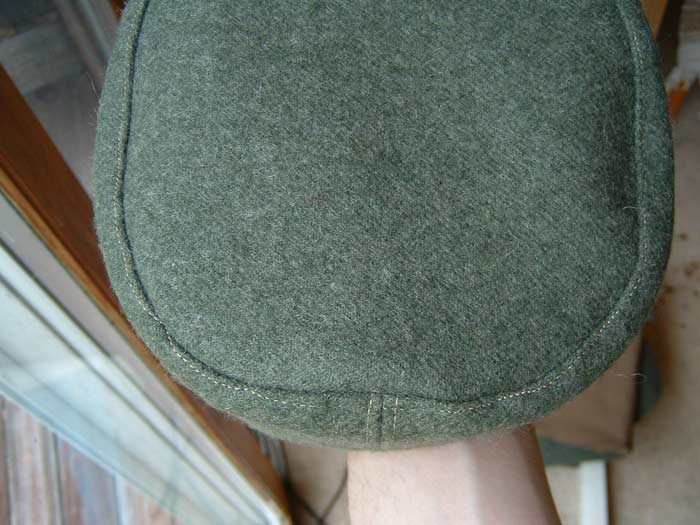 |
<< previous next >>