| step 8 - attaching flaps
|
pin the flaps to the rear of the hat as shown. make sure the seam in the flaps lines up with the seam in the rear of the hat. note that the "inside" of the flaps is facing outward here. this is because, if you remember the construction of m43 hats, those flaps are normally folded down to cover up those raw edges you see here. i must have screwed this one up like 5 times in the past and sewed the flaps to the hat the wrong way around, because when you look at it right here, it looks wrong. it's not wrong. 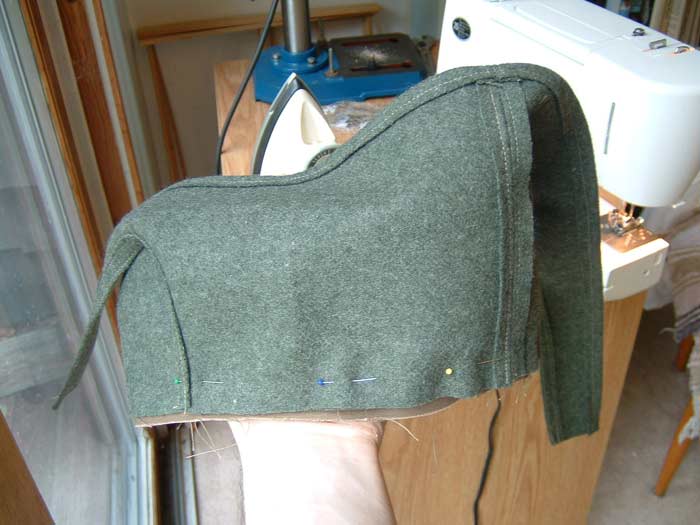 sew it on like that, with the stitch about 1.5cm-2cm in from the edge. more than normal cause its going to be a thick edge and we need more wiggle room. |
then, you want to take some scissors and cut the inner layer of wool off, pretty close to the stitch, as seen in the bottom photo. you do this because when you fold the wool under for the final stitching, it would be too thick to sew if both layers of wool were folded there.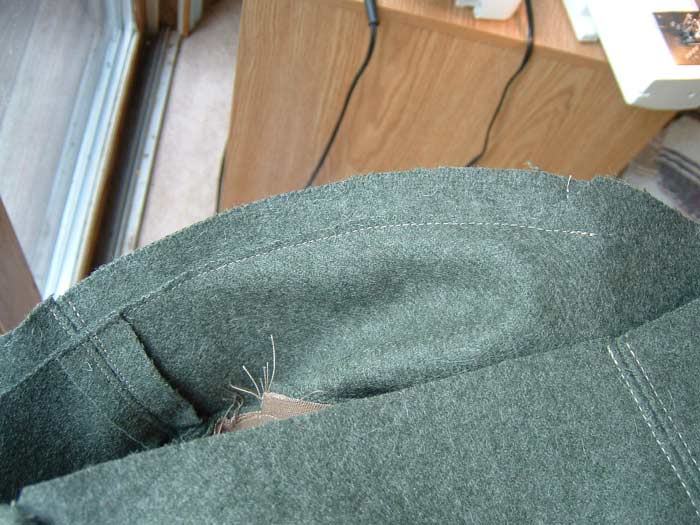 |
<< previous next >>